Your once beloved furniture doesn’t just feel right in the room, giving an off-put feel to your interiors. Now you are on a budget and can’t seem to buy a new one. So, how should you go about this old furniture? Well, there is one way that can breathe new life into that old furniture. This is the art of refinishing the customized furniture. By refinishing the furniture, you can restore even the most antique pieces. With this solution arises a new question: How to refinish furniture?
Let us take care of this part for you. We have done the research and bring to you the step-by-step guide to refinishing furniture.
Why You Should Refinish Furniture Instead Of Buying New?

To refinish your home or office furniture is one of the cost-effective ways for home decor. A few of the reasons for Furniture Upholstery Dubai are as follows.
- With furniture restoration, you will be able to restore your family heirloom of furniture; keeping its sentimental value intact for years to come.
- Discarding old furniture is harmful to the environment. With refinishing, you actually help reduce waste, making it an eco-friendly option.
- During refinishing and restoration of the old furniture, you can add some personal style to it. You can customize it for a modern, classical, or rustic look.
- Buying new furniture can be a huge financial burden and refinishing costs just a fraction of the new furniture price. This makes it a budget-conscious choice as well.
Step By Step Guide On How To Refinish Furniture
The first thing you need to consider before starting the refinishing process is to assess the piece of furniture. Check, if the furniture is worth the time, effort, and money for refinishing. The best furniture that responds to refinishing is wooden furniture. Wood can be finished multiple times and is highly durable to withstand the process. The steps to furniture refinishing are as follows.
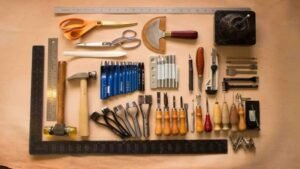
Collect The Right Tools & Materials

If you want to do a great furniture refinishing job, you need to have the right materials and tools.
Tools Required:
- A screwdriver set
- Sandpaper of Grits 80, 120, 220
- A Scraper
- Foam Brushes
- Cleaning rag
Materials Required:
- A Wood Stripper to remove old paint or finish
- A Wood Filler to fix any crack or hole
- Wood stain to do staining of the furniture
- Varnish or Furniture Wax for a protective coating
- Paint or Primer, in case of not doing staining
Ready the Furniture For Refinishing Process

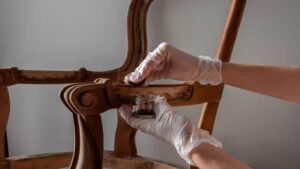
The key to any perfect refinishing job is preparation. You need to prepare your furniture by removing any of the hardware, such as the knobs, hinges, or drawer pulls. Keep them in a safe place and start the cleaning process in the following manner.
First, take a damp cloth and clean the entire furniture thoroughly. Remove any dust, grime, and dirt that can affect the refinishing. You can also use a mild dish soap and water solution for this. If the stains are tough to remove, you can use the TSP (trisodium phosphate) cleaner. They work best, especially for the kitchen’s furniture. Let the furniture dry as well before doing the next step.
Strip Off The Old Finish
If your furniture has an old stain or paint, you will need to strip it all off before sanding. For this, use these steps.
- Use a chemical wood stripper with a foam brush and apply it on the furniture. Let it rest for the time mentioned on the bottle.
- Use the scraper to remove the loose finish of stain or paint.
- Use water or mineral spirits to clean the furniture and remove any residual stripper.
- Keep in mind that this is going to be a messy step but a crucial one.
Sanding the Furniture

Sanding the furniture is one of the essential steps in furniture refinishing. Sanding the furniture will smoothen the wood and remove any stains or paint you might have missed earlier. Sanding is done in 3 stages;
- Start off with an 80-grit sandpaper to remove any visible patches.
- Move onto the 120-grit sandpaper to create a smooth surface.
- Finish it off with 220-grit sandpaper for a fine texture.
Sanding works best if done by hand – allowing one to reach all the nooks and crannies.
Fix Any Damage With A Wood Filler
Once you are done with sanding, it’s time to fix any cracks, dents, or holes in the furniture. For this, use the wood filler to patch these damages. Apply the wood filler with a putty knife and let it dry out. Once the filler is dry, use the 220-grit sandpaper to smooth it to a seamless finish.
Paint Or Stain The Furniture

Now that the furniture has been stripped of old stain, sanded down, and damaged fixed, it’s time for the actual job: furniture refinishing. There are two ways to do it: Staining Or Painting. The steps for both are as follows.
Staining:
Staining brings out the natural beauty of the furniture’s wooden grain.
- Apply a wood conditioner to softwoods like cherry or pine. The conditioner allows the stain to be absorbed in an even manner.
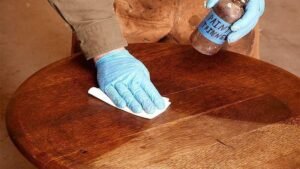
- Apply the preferred wood stain with a cleaning rag, remembering to apply it in the grain’s natural direction.
- Let it rest for a few minutes before wiping off the excess stain, or it will result in uneven coloring.
- Allow this stain to fully dry, which takes about 24 hours.
Painting:
For a paint finish, follow these steps.
- Use the primer on the sanded-down furniture. Primer is preferred if you are using a light paint color.
- Use the paintbrush to apply the paint in even, thin coats. Let each coat dry before applying the next.
- Apply 2 to 3 coats for complete and even coverage.
Do A Protective Topcoat & Reattach The Hardware
Whether you stain or paint the furniture, you need to apply a protective topcoat on it to preserve the furniture. You can use the following topcoat options.
- A polyethylene finish is available in matte, glossy, or satin finishes.
- Wax finish for a matte look on chalk-painted furniture; can be buffed for sheen.
- Lacquer Or Varnish, both of which are durable, with lacquer being more professional.
Use the foam to apply the topcoat, which should be done in multiple coats. Allow each coat to dry before applying the next, which takes about 24 to 48 hours. Reattach the hardware removed earlier and enjoy the refinished furniture.
Our Final Say
Refinishing your old furniture is a great DIY project for any homeowner. It is a satisfying way to spend your weekend, and it is surely going to save you some bucks. This guide of ours on how to refinish furniture will be a massive help in letting you do a banging DIY job.


